


Planning a Route on Your Computer
1. Visit the RIDE COMMAND website to create an account or log in to your existing account.
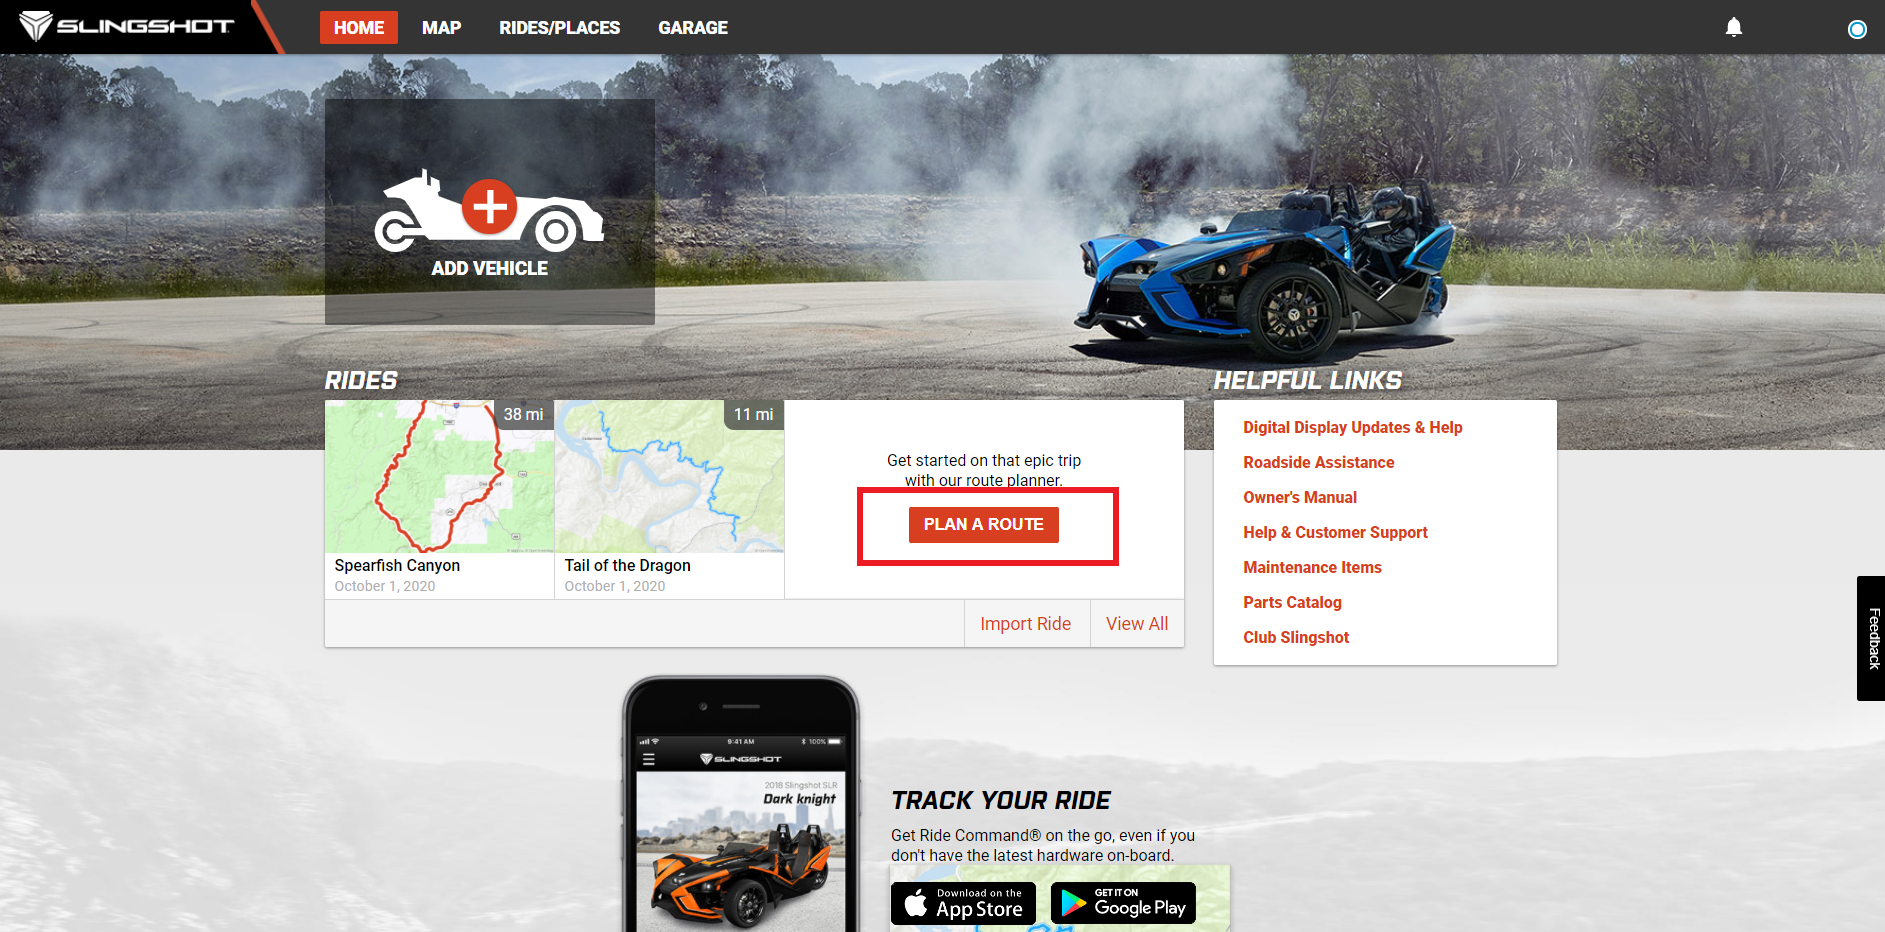
2. Once logged in, click PLAN A ROUTE.
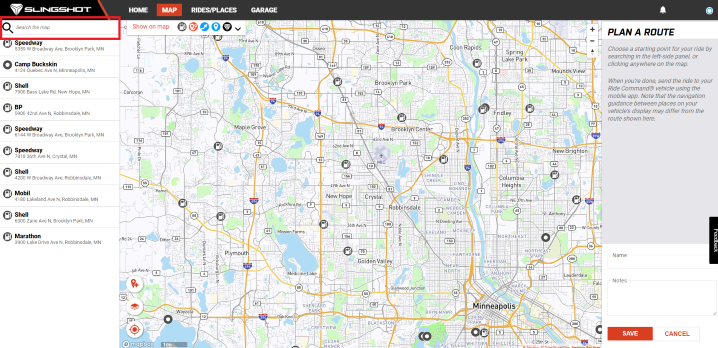
3. Search for your stops and/or destination in the search bar, located in the upper-left-hand corner of the screen. Once you find your desired stop or destination, select ADD TO ROUTE. Repeat this step until all stops have been added to your route.
4. To save custom locations on your map, select the waypoint icon in the lower-left-hand corner of the map.
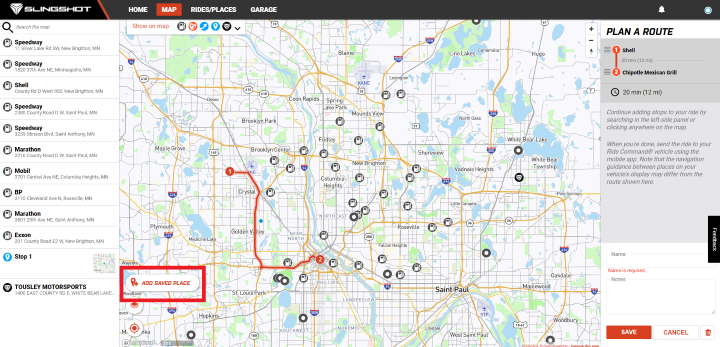
5. Name and save the custom location. Click ADD to add to your route.
6. Under PLAN A ROUTE on the right side of the screen, you can rearrange stopping points by dragging and re-ordering them.
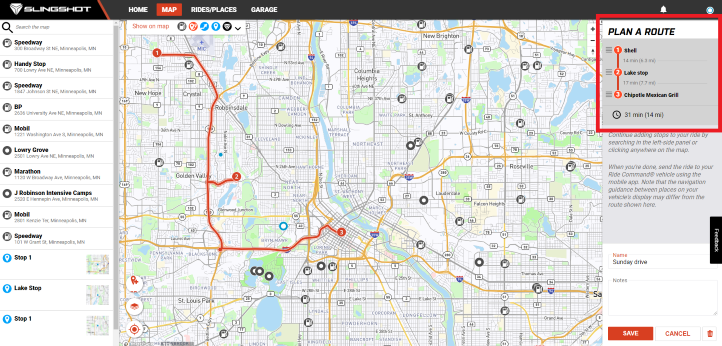
7. Name and save the route. Once saved, the route will be accessible on your internet-enabled mobile device.
For 2020 and Newer RIDE COMMAND
For model year 2020 and newer Slingshot vehicles, you can sync a ride to your Slingshot with Bluetooth® tethering or an active RIDE COMMAND+ connected services subscription. If you have an active RIDE COMMAND+ connected services subscription, you can skip to step 5 because the modem will complete the sync automatically.
Always keep the software on your 2020+ 7" Display powered by RIDE COMMAND up to date for best results. Read Updating Slingshot Software and Maps on the 2020+ 7" Display Powered by RIDE COMMAND for update instructions.
1. Go to Settings on your phone. For an iPhone®, go to Personal Hotspot Connections, Mobile Hotspot and Tethering. If using an Android®, tap on Bluetooth® tethering and turn it on. Leave the phone on this screen.
2. On the display, go to Settings/General/Bluetooth Devices and tap ADD DEVICE.
3. Once your phone shows up on the list, tap to pair.
4. Accept the pairing code in your phone. On an iPhone® you will see a blue line at the top of your phone screen indicating it’s connected to a mobile hotspot. On an Android® it will show in the Bluetooth® tethered list.
5. Once you have confirmed you are tethered, go to Settings > Ride Command Account on the display.
6. If you aren't already logged into your RIDE COMMAND account, log in. Ensure that Sync to Account is turned on.
7. Tap the Map button from the seven-button panel after your login is successful.
8. Tap the More menu at the bottom of the screen.
9. Tap RIDES AND WAYPOINTS to see your options.
For 2019 and Older RIDE COMMAND
1. Log in to your RIDE COMMAND account on the display on your Slingshot.
To log in, follow these steps:
- Tap the Slingshot logo at the top middle of the screen.
- Tap on ALL SETTINGS.
- Tap the GENERAL tab on the left-hand side.
- Tap the RIDE COMMAND ACCOUNT tab at the top of the General screen.
- Tap on ACCOUNT ID.
- Type in the email address associated with your account and save.
- Type in your password and save.
Note that it may take several minutes to sync places and routes to/from the RIDE COMMAND Cloud.
2. Navigate to the Import/Export menu on the 7" Display powered by RIDE COMMAND by selecting Maps > More > Import/Export.
3. Copy the route from the Slingshot App to the display by using one of the following two methods:
- Checkmark places and routes you wish to import and then tap on COPY TO/FROM RIDE COMMAND. On the pop-up screen select either SEND to export or CANCEL to return.
- Tap on COPY TO/FROM RIDE COMMAND, and then tap on the right arrow near the places and routes to export.
You can also share rides to your vehicle using Bluetooth®.
1. Pair your mobile device to your Slingshot and transfer the route via Bluetooth®.
2. Tap the rides icon on the mobile device to open your saved routes. Tap the vehicle icon beside the desired route to send it to your Slingshot. A green checkmark indicates the route has been added to the Slingshot.
3. Tap the search (magnifying glass) icon on the Slingshot Maps screen.
4. Tap the SAVED tab on the left panel of the screen display.
5. Click on your desired route and follow the on-screen directions. When prompted to calculate route, select YES. Click GO and your navigation will start.
The following video demonstrates how to plan a route on the RIDE COMMAND website and transfer it to your model year 2017-19 Slingshot using the Slingshot App.
More information can be found on the Slingshot RIDE COMMAND website and in Slingshot RIDE COMMAND Overview for Model Year 2017-19 or RIDE COMMAND Overview for Model Year 2020 and Newer Slingshot.
The Slingshot App is available on the App Store® for iPhone® and iPad® and on Google Play®.
Android®, Google Play® and YouTube® are registered trademarks of Google LLC
Bluetooth® is a registered trademark of Bluetooth Sig, Inc.
App Store®, iPad® and iPhone® are registered trademarks of Apple Inc.
Mapboxsm is a service trademark of Mapbox, Inc.
OpenStreetMapsm is a service trademark of OpenStreetMap Foundation
Unless noted, trademarks are the property of Polaris Industries Inc.
© 2022 Polaris Industries Inc.


