

Some model year 2020 and newer Polaris Slingshot vehicles are equipped with a 7" Display powered by RIDE COMMAND. The display has seven buttons, which provide access to seven screens. This display offers Bluetooth® and USB audio, vehicle information and turn-by-turn navigation.
Warning: Do not enter information while operating your vehicle. Failure to pay attention to the operation of your vehicle could result in loss of control, injury, or death. You assume all risks associated with using this device. Read your User Guide thoroughly and always ride with the latest maps and road data from ridecommand.slingshot.polaris.com.
The RIDE COMMAND console, shown below, features seven hard buttons at the bottom of the display.
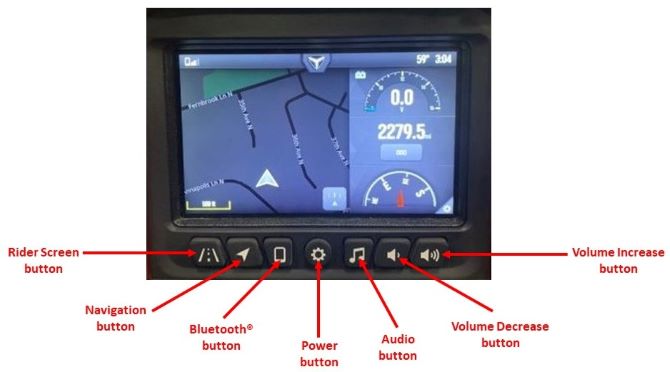
Power Button
The Power button turns the display on and off while your Slingshot is in use.
Rider Screen Button
The Rider Screen button allows you to access the customizable split screen menu system, ride data, vehicle status and vehicle information. To customize the split screen menu, click the options buttons on the lower corner of the screen and choose what information you’d like displayed.
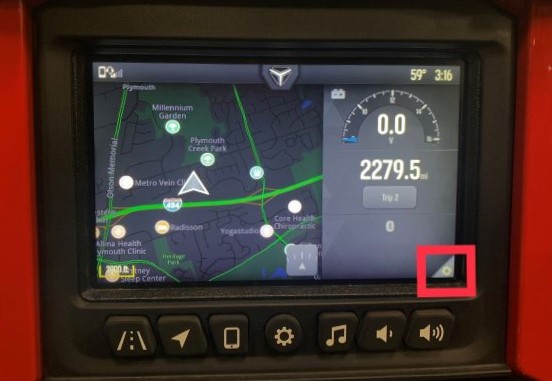
This will open a screen from which you can select, delete and move the widgets displayed on the Rider Screen. Select DONE when satisfied with your Rider Screen configuration.

Navigation Button
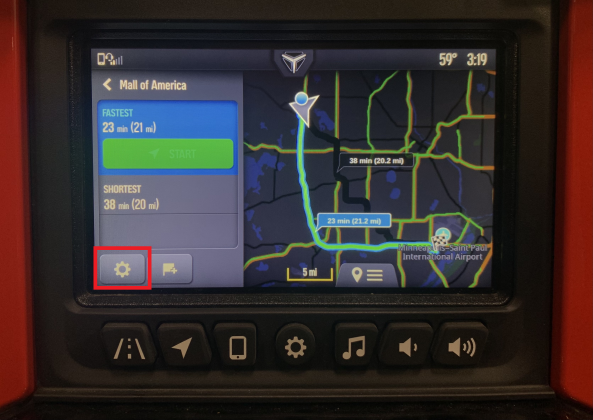
The Navigation button is how you can access RIDE COMMAND navigation features. Find directions and look up addresses, gas stations and other points of interest. To plan a route, click on the search button in the lower-right corner of the screen.
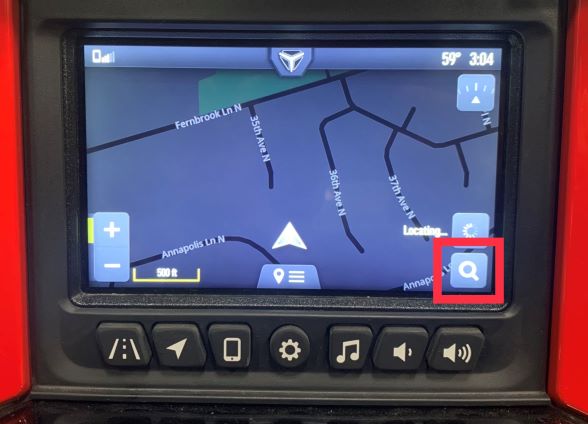
Here, you can browse saved locations, location categories or enter the name/address of your destination.

To navigate to a specific place, enter the name or address in the search bar. Click SEARCH when you find your desired destination.
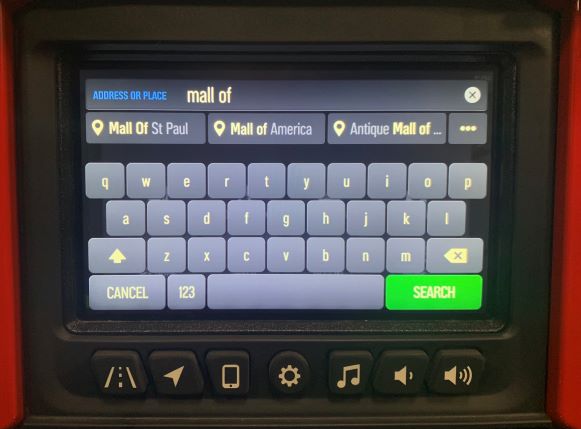
Click the green arrow to begin navigation to the destination. You can choose between the fastest and shortest route. Click the settings button in the corner of the screen (highlighted below) to access route planning settings.
Audio Button
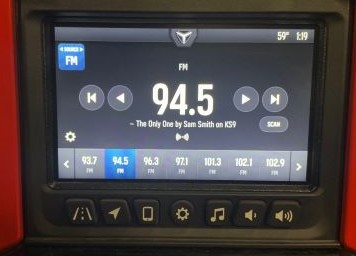
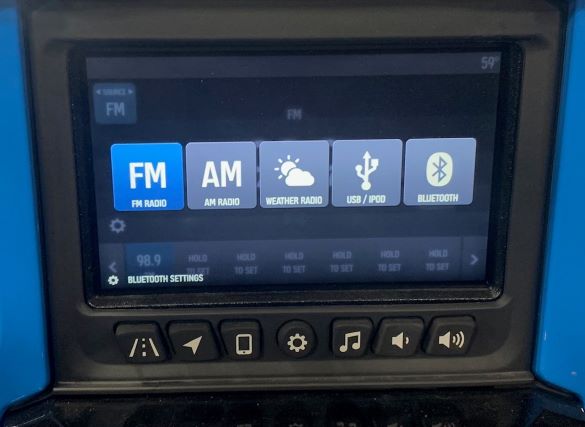
The Audio button allows you to change the audio source and set radio presets. To change the source, push the source button and choose from FM, AM, weather radio, Bluetooth® and USB.
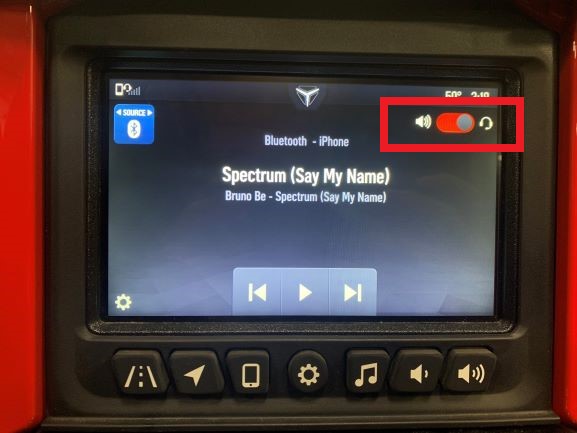
When a headset is paired, you can choose to listen to audio through the vehicle speakers or through the connected headset by toggling the switch shown below. For more information, read Pairing Your SENA® Headset or Pairing Your Cardo® Headset.
For more information on audio playback, read Playing Music with the 2020+ 7" Display Powered by RIDE COMMAND.
Volume Buttons
The Volume Decrease button adjusts the volume downward. The Volume Increase button adjusts the volume upward. To mute the audio, turn the volume all the way down.
Apple CarPlay®
Apple CarPlay® seamlessly integrates your iPhone® with the Slingshot's display powered by RIDE COMMAND and controls (Bluetooth® headset required). Make phone calls, access your music, send and receive messages, get directions and more while you stay focused on the road. See Using Apple CarPlay® on RIDE COMMAND for more information.
RIDE COMMAND Settings
The Settings Menu is where you can personalize your RIDE COMMAND System. You can configure settings, such as language, speed units, and time formats, as well as audio and vehicle settings.
To access the settings menu, tap the Power button in the middle of the seven-button panel. This will take you to the Settings Menu, where you will find five settings categories: Info, General, Time, Audio, and Vehicle. Choose from these five settings categories by selecting the corresponding tab on the left side of the screen.
From the Info settings menu, you can do the following:
- View Vehicle Identification Number (VIN)
- View display software version
- View total miles
- View engine hours
- View next service
From the General settings menu, you can do the following:
- Change the language
- Set speed units (MPH or KPH)
- Set the pressure units (PSI or kPa)
- Set the temperature units (F or C)
- Set the volume units (US Gal, IMP, Gal, or L)
- Update maps
- Access system information
- Log in to your Slingshot account
- Tap the Badge Panel button (Slingshot icon) at the top of the screen.
- Select ALL SETTINGS > GENERAL SETTINGS > RIDE COMMAND ACCOUNT.
- Log in to your Slingshot account with your email and account password.
From the Time settings menu, you can do the following:
- Set the time format (12-hour or 24-hour)
- Enable GPS time, which automatically sets the time to the time zone you are currently in
- Set the time
- Enable/disable Daylight Saving Time
From the Audio settings menu, you can:
- Adjust the fade and balance
- Clear AM/FM presets
- Set the radio tuner region
From the Vehicle settings menu, you can:
- Access vehicle diagnostics
- View GP status (if equipped)
- Override automatic power down
Back-Up Camera (if equipped)
The back-up camera is not intended to replace standard driving practices of checking your surroundings before operating in reverse. Always check for pedestrians, vehicles and other obstacles before operating in reverse.
The camera and display screen automatically activate when the transmission is shifted to reverse gear. Do not operate the vehicle until the back-up camera image is clearly shown on the display screen.
Update the software on your 2020+ 7" Display powered by RIDE COMMAND to the April 2023 or newer update to view the reverse camera when in drive. If the vehicle is travelling above 8 mph, there will be a 10 second countdown until the back-up camera shuts off. If the vehicle is travelling below 8 mph, the camera will stay on continuously.
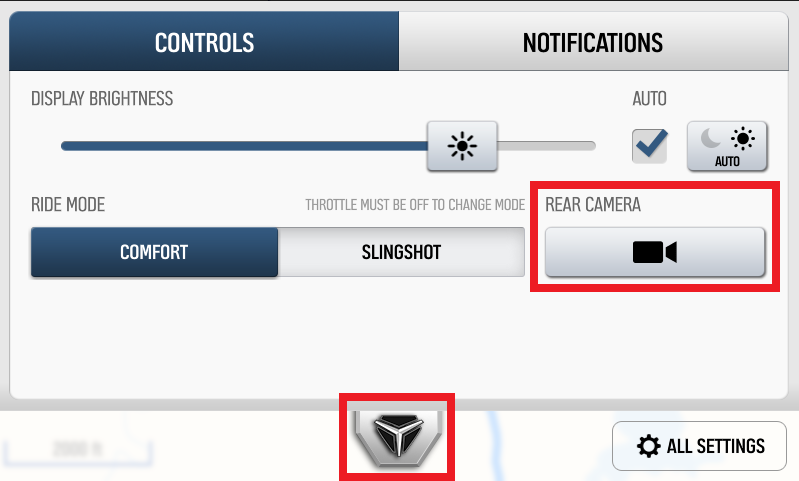
To activate the rear camera when in drive:
1. Press the Settings hard button once or tap the Slingshot logo at the top of the screen to drop down the Badge panel.
2. Tap the Rear Camera symbol.
For more information, consult your Owner’s Manual or visit the RIDE COMMAND website.
CarPlay® and iPhone® are registered trademarks of Apple Inc.
Bluetooth® is a registered trademark of Bluetooth Sig, Inc.
SENA® is a registered trademark of SENA Technologies, Inc.
Cardo® is a registered trademark of Cardo Systems, Inc.
Unless noted, trademarks are the property of Polaris Industries Inc.
© 2022 Polaris Industries Inc.


